No Product Yet
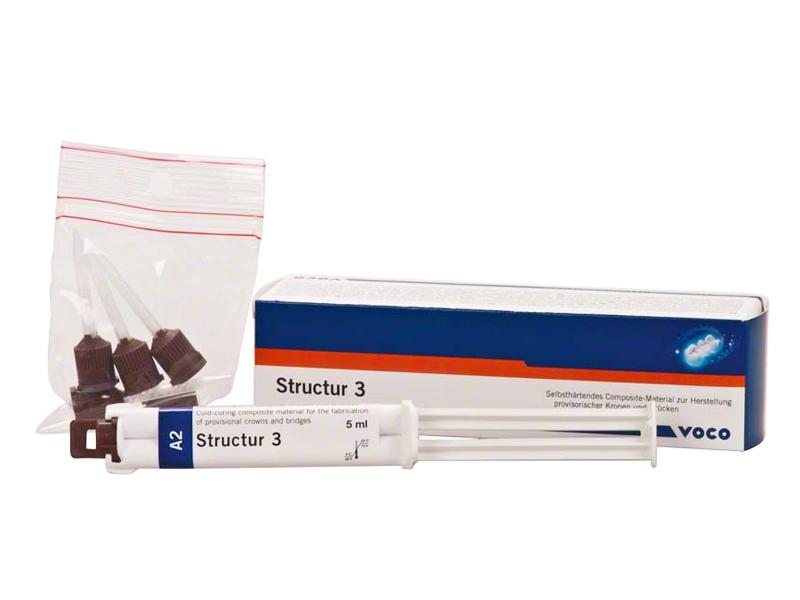
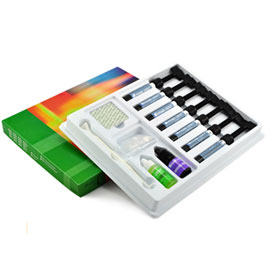
VOCO Structur 3 Quickmix Syringe 5ML
Cold Cure Compomer
Cash on Delivery (COD) Payment Service Available COD enabled for selected products only. If all items in your cart are COD enabled. The eligible cart value for COD falls within the Rs. 100 to Rs. 10,000 range.
 Save Extra with 4 offers Partner Offers: Get GST invoice and sav up to 28% on business purchases.
 Save Rs. 500 Discount on order above Rs 20,000
Save Rs. 200 Discount on order above Rs 10,000
Save Rs. 100 Delivery charges on orders above Rs 5,000
Now go add some variable products!
Description
Structur 3:
Cold-curing composite material for the fabrication of provisional crowns and bridges
INDICATIONS:
Fabrication of temporary crowns, bridges, inlays, onlays, partial crowns, veneers and temporary posts
Fabrication of long-term temporaries
Lining of pre-fabricated temporary crowns made from composite materials, polycarbonate or metal
| Brand | VOCO |
|---|---|
| Features | Processing Quick, simple and reliable thanks to the 1:1 cartridge system Short setting time Elastic phase allows simple removal from the prepared tooth Gloss without polishing only requires removal from the inhibition layer Aesthetics Natural gloss and fluorescence Available in eight shades Durability High compressive strength Excellent fracture resistance |
| Directions To USE | Structur 3 in the QuickMix syringe: Due to technical reasons slight differences in the filling level between the syringe chambers can occur prior to the first use. Therefore remove syringe cap and squeeze the material out until the material is delivered evenly from both chambers. Afterwards place a mixing tip type 10. The slots on the syringe and the mixing tip must correspond. The mixing tip is fixed by rotating it clockwise through 90°. The material is automatically mixed in the correct ratio in the tip as it is dispensed and can be applied immediately. All QM syringes come with a detachable piston. The piston can easily be pulled backwards out of the syringe and then reinserted. The seals in the syringe do not change their position whilst this is being done. This prevents cross-contamination of the material in the syringe Processing directions: First level out any undercuts in the preparation using a non-eugenol cement. Take an impression if not using prefabricated dental copings or similar restorative materials. Prepare the impression by levelling undercuts and cutting drainage channels. If the wall thickness of the temporary restoration is expected to be too thin, enlarge the impression, paying particular attention to removing the septums in the interdental embrasures. In case of gaps in the molar region, cut a groove in the impression to maintain a stable, bar-shaped connection in the temporary restoration. Then clean and air dry the impression. Apply Structur 3 directly into the impression, applying the material initially to the occlusal surfaces of the impression and filling up towards the gingival areas. To prevent the formation of bubbles during application, always keep the opening of the mixing tip immersed in the material. Insert the impression into the mouth no later than 30 seconds after commencement of mixing. Remove the temporary restoration from the mouth during the elastic phase i.e. within 1 to 1.5 minutes after beginning to mix. The setting process should additionally be monitored by observing the excess material in the mouth. The setting time of material (in mixing tips) that has not been used cannot be compared to the setting time of the material in the mouth. Different room temperatures may result in variations from the above times. Higher temperatures shorten and lower temperatures extend these times. Finishing: Extract the temporary restoration from the impression after 4 minutes at the earliest and completely remove the inhibition layer, caused by oxygen in the air, by wiping with alcohol (e.g. ethanol). Then carefully grind any excess material and rough areas near the gingiva. If necessary, finish the temporary restoration with fine, cross-cut carbide burs. If required, polish the temporary restoration manually (e.g. with a rubber polisher, fine sandpaper or goat hair brush). Luting: Carefully clean and dry the core, if necessary removing any insulating material. Attach the finished temporary restorations with a temporary luting cement. Eugenol cements can inhibit the setting of luting composites that may be used later at the permanent luting stage. If a luting composite is to be used for permanent luting, attach the temporary restoration with a eugenol-free cement Customisation, repairs and rebasing: The following procedures are recommended for customisation, repairs or rebasing: Repair of defective temporary restorations: - Air bubbles: fill with Structur 3. - In the case of a fracture of a newly made temporary restoration: re-connect the fracture with freshly mixed Structur 3 Repair of temporary restorations that have already been worn: Roughen the fracture with a bur and place undercuts. Apply bond (e.g. Solobond Plus Adhesive) to the prepared fractures and cure according to the respective instructions for use. Apply a flowable material to the prepared areas (GrandioSO Flow is suitable for this purpose because it provides optimum shade matching). Reassemble the fractured pieces and cure according to the instructions for use Customisation: Apply a flowable material (e.g. GrandioSO Flow) in the required shade to the freshly prepared temporary restoration and then cure and finish according to the instructions for use Rebasing prefabricated, temporary crowns: Apply Structur 3 to the prefabricated, temporary crown, following the respective manufacturer’s instructions for use Place the prefabricated crown on the prepared core Remove the prefabricated crown from the mouth during the elastic phase, i.e. 1 to 1.5 minutes after commencement of mixing In addition, monitor the setting process by observing the excess material in the mouth. The setting time of material (in mixing tips) that has not been used cannot be compared to the setting time in the mouth Remove excess material after 4 minutes at the earliest and finish |
| Packaging | Voco Structur 3 QM A2:- 1 x QuickMix syringe 5ml. Mixing Tips |
|---|